Wednesday, December 30, 2015

Paint and oxidation removal

After the disassembly, cleaning the individual parts and removing the bearings, the next step was to remove the genuine silver paint on crankcase halves.  


This was done by applying the layer of chemical remover with the brush. Note that the engine serial number punched bears only the particular code of the bike (5Y7) on the japanese home market models.


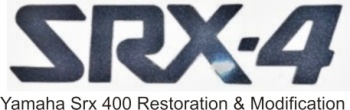
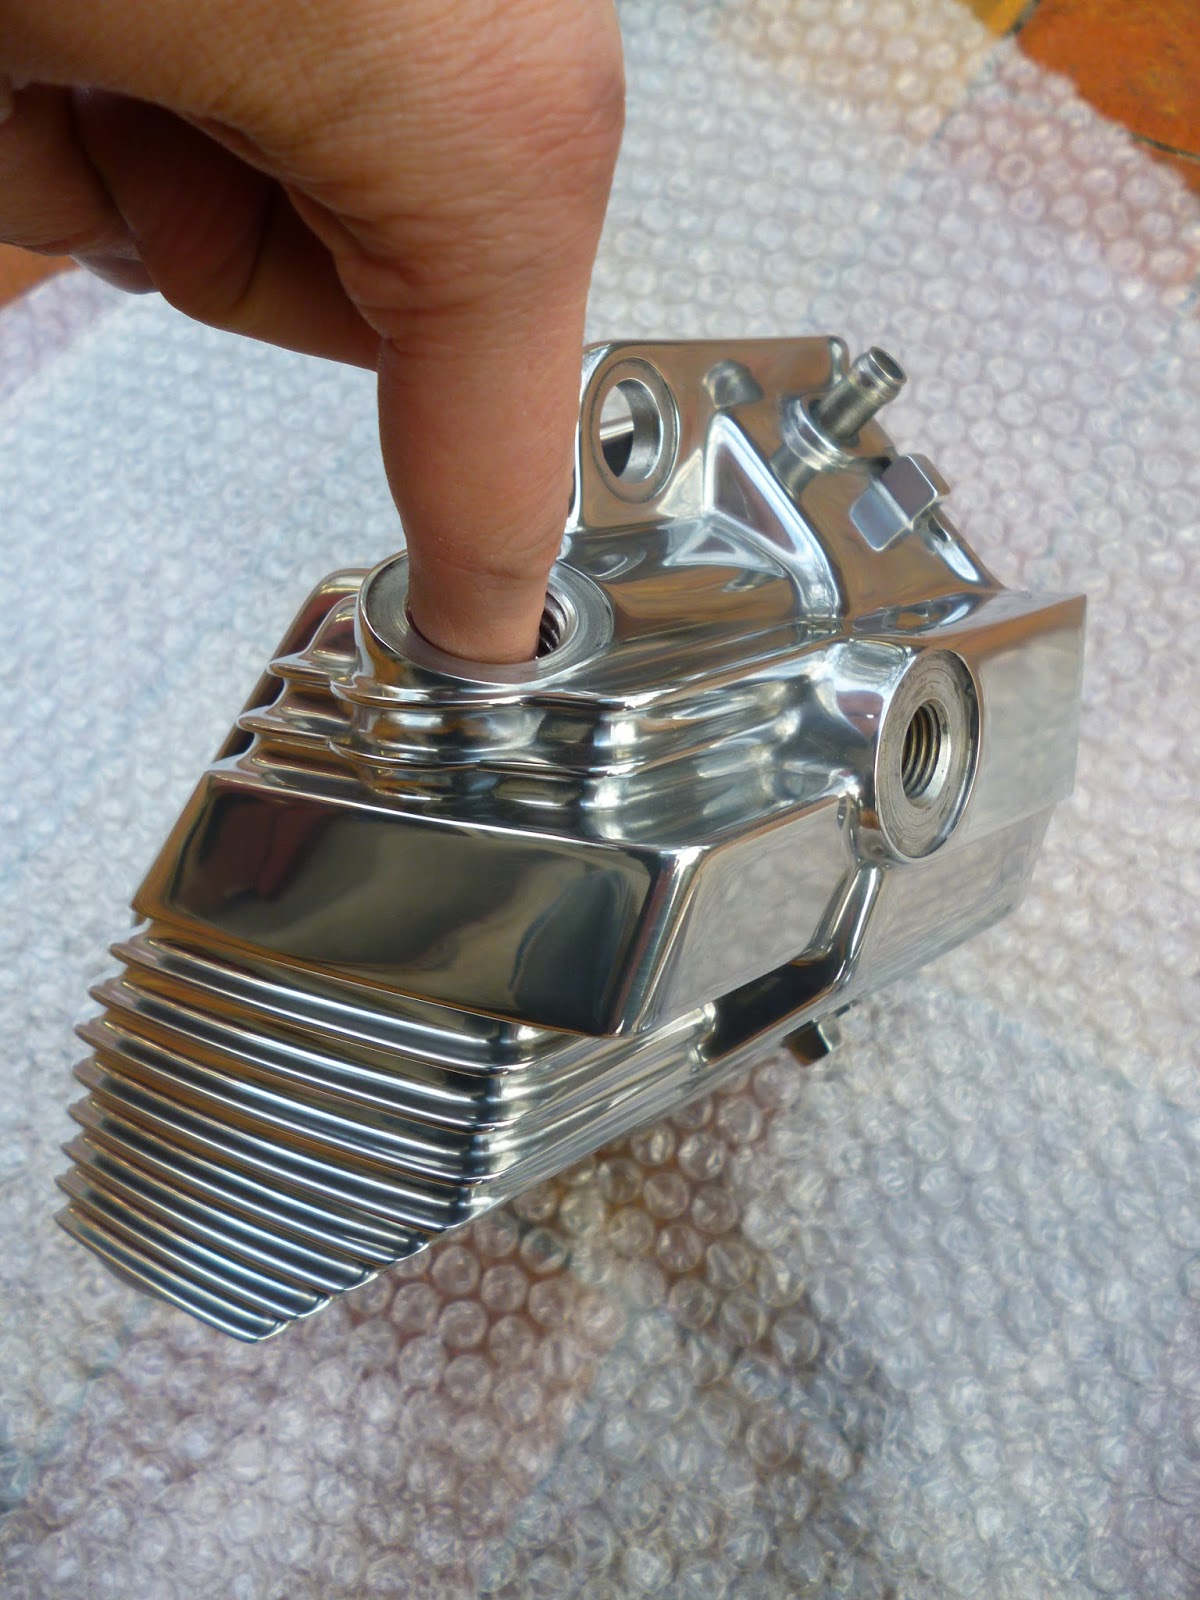
Following issue was to remove an oxidation and dust on the limited accessible places like valve cover.


We wanted to avoid sand blasting in order to preserve the contact surfaces intact, so a variety of abrasive wheels, sand paper, thinner and slow manual work have been utilised.


Another problem to be solved is a missing edge of the upper rib of the cylinder.


The plan is to paint these parts with a primer and then with a black gloss coat suitable for high temperature. At the moment, it is clear, that another parts have to be replaced, eg. the valve guides and the valve rocker arms.

Saturday, December 26, 2015

Engine disassembly and cleaning

Appart from esthetic constituent, the mechanical side of thing is equally important. Many customizers on the popular bike scene nowadays basically don't mess up with the bike's internal parts. They buy the most preserved bike possible and do mostly the visual stuff, using a broad scale of aftermarket parts and add-ons. Hm, I would be most cautious about starting customizing a classic bike, nevertheless I am far from denying the creative input which sometimes leads to wonderful unique rides. Anyway, the bike we got here is not just this case. The engine rebuild was considered as necessary earlier, due to the srx strong inclination to drink an obscene amount of oil:)


The first momentary inspection revealed no major issues; even the piston and the cylinder show no excessive damage. A thorough inspection will follow. The intention is to restore the engine from the scratch and to replace all the bearings and seals, but primarily the piston and the rings, the gudgeon pin and the circlips, valves and other parts which turn necessary to replace. Luckilly, the srx 400 shares very many parts with its bigger sister, the "600." However, some OEM parts must be ordered directly from Japan, because the srx 400 has never been oficially sold overseas and these parts are specific to this model. Some parts, like the head gasket, are allegedly already out of stock...         

Monday, November 30, 2015

Oil tank

Summertime is meant for being spend in the saddle, twisting the throttle on the road, so the new update from the garage comes with late autumn - and without any rush. What we got here - the srx engine is a dry sump, so the remote tank bears 1,8 l of oil and it consists of the two halves. Both casts are an eye candy organic shape and it is very desirable to have it polished. When I separated these halves for the first time, the content resembled a coal mine. There was no decomposed oil, but a layers of soot. It seems the bike didn't get a proper maintenance during its life and an exchange of the oil filter has not been a regular procedure. After the cleaning, it was possible to start smoothing the surface. This is the most complex part I've ever polished and the preparation has been very challenging. The shape with multiple ribs, corners and brackets took some 7 days of smoothing (each half) and all was done manually. The polishing utilised various size of wheels in order to reach the tiny corners and it took another whole day.


      here we go...


Tuesday, June 16, 2015

Some duperele added

Some tiny little indispensable pieces, which we call "duperele" in this part of the world, added.


Monday, May 18, 2015

"Torso"

The long awaited day is here - the chassis stands on its wheels for the first time!!! Check the pics from the assembly. Until the last, I had to do some minor paint retouches that drove me mad (because of the rectangular frame and swingarm which are really hell to smooth). But now I can say there is no undercoat show through at all. And the assembly went just like one two three. What a thrill! You may see the video at  http://youtu.be/rit27zWioNI 


the lower cradle attached


with a little help from my little friend (actually, the service handbook eater)


Thursday, May 14, 2015

Black gold

In addition to previous, these are the new Bridgestone Battlax tires according to the genuine specs 100/80 18" and 120/90 18".


Monday, May 11, 2015

Misc.

Adding a summary of miscellaneous things during the assembly. The front fork absorbers were damaged around the groove where the seals are installed, so there was need for some metallic resin. Again, some people rather should stick to repairing the caterpillars with hammers, but they should not approach the bikes from any distance. The result now is ok. I pray for no leakage. Currently, I complete the forks assembly, so new parts are the seals, dust seals, slide bushes, pins, etc.


These are the stock handlebars, which were damaged, too. The tubes on the both sides were bend after numerous crashes, so a new tubes with a same diameter and lenght replaced the genuine ones. This was done some time ago, together with a chrome plating of the handlebar head.


This morning, the japanese "waffle" grips had arrived all the way from Australia (yes, the shipping cost to the Central Europe wasn't nice). Nevertheless, this will be a fine enhancement of the bike's cafe style. Love it!


Another new polished piece is the clutch cover on the right side of the engine and 
the chain puller pads.


...details are the whole deal...


Today, I'll go to pick a new tires, so the further post will come soon. Have a lovely day! :)