The tank is back home for Christmas - after the two months spent in one manufacturing company in the town nearby. The result is incomplete, still a workpiece. But it is not entirely bad, I mean, it could have been worse :) Actually, I am surprised. The guys delivered the tank with the welded seams already partially smoothened...Anyway, some welding work still needs to be done, particularly concernig the mounting bracket at the rear of the tank, which we have bended in order to enable the access to the inner side. At least I can get the rust out from there.
I am curious about the check with the tank mounted onto the frame and under the saddle..some reshaping is possible regarding the back left/right corner of the tank.
Saturday, December 24, 2016
Saturday, December 17, 2016
Exhaust pipes & rear master cylinder
There was a small dent on the outer surface of the exhaust pipe - first, I was considering wrappping it with a heat tape, which is highly fashionable among the builders now, but this solution later seemed to me rather cheap - visually and mostly in terms of renovation. Luckilly, it was possible to reshape the dent after heating it with a heat gun and using a pointed iron rod through the inner side so that no welding was eventually needed.
After cleaning, smoothening and polishing, the pipes regained original look. Surprisingly, the ring on the top of the pipe. where it is mounted to the cylinder, is made of plain steel and not a stainless (as the pipes are). It will be later on painted with a heat resistant colour.
Secondly, here is the new kit for the rear master cylinder
Condition of the former inner functional parts was as follows:
Applying a film of the vaseline
Pushing it down
And locking the rod with a circlip
Sunday, July 10, 2016
Tank (t)issue
After some time spent resurrecting another ride, here we have bended iron sheets of an appropriate thickness, cut and folded according to the genuine shape (deep bow à mon père). Further step will include welding it correctly to the respective places. Then there are some minor details like polished cylinder head plugs and timing chain tensioner. The rear fender covered with layer of paint for bumpers and attached (it has a texture in comparison to the original smooth surface, but looks pretty well).
Saturday, February 20, 2016
More rust :)
The bottom of the tank was affected by the major corrosion and hasn't been repaired in a truly thorough manner, using thick layers of brass (the surface also shows many dents, it was probably crashed as well). Today, we simply cut these parts off with an angle grinder...bye bye
looks like a beginning of the new adventure...
prior to that, I used this handful of screws and nuts in order to get rid of inner rust. After proper shaking and pouring out
what fun!
From rust to chrome
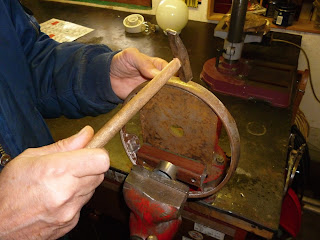
...& new mounted parts. The headlight rim was bent and needed some repair. First, I let it de-galvanized and then gave it a bit of tinsmith treatment. Once it was straight, I sanded the piece and let it chrome plated again.
together with another chromed parts
the only powder coated bits are the front fender mounting bracket and the sidestand
finally the much-favoured "cafe" look
airbox unit, rear fender, CDI, oil tank and brake fluid container added
Saturday, January 2, 2016
Subscribe to:
Posts (Atom)


